/Documentation/Tutorials/Multiple Servers

Multiple Servers

In this tutorial, we show you step by step how to:

  • Setup and configure multiple patch servers
  • Enforce a Primary Server

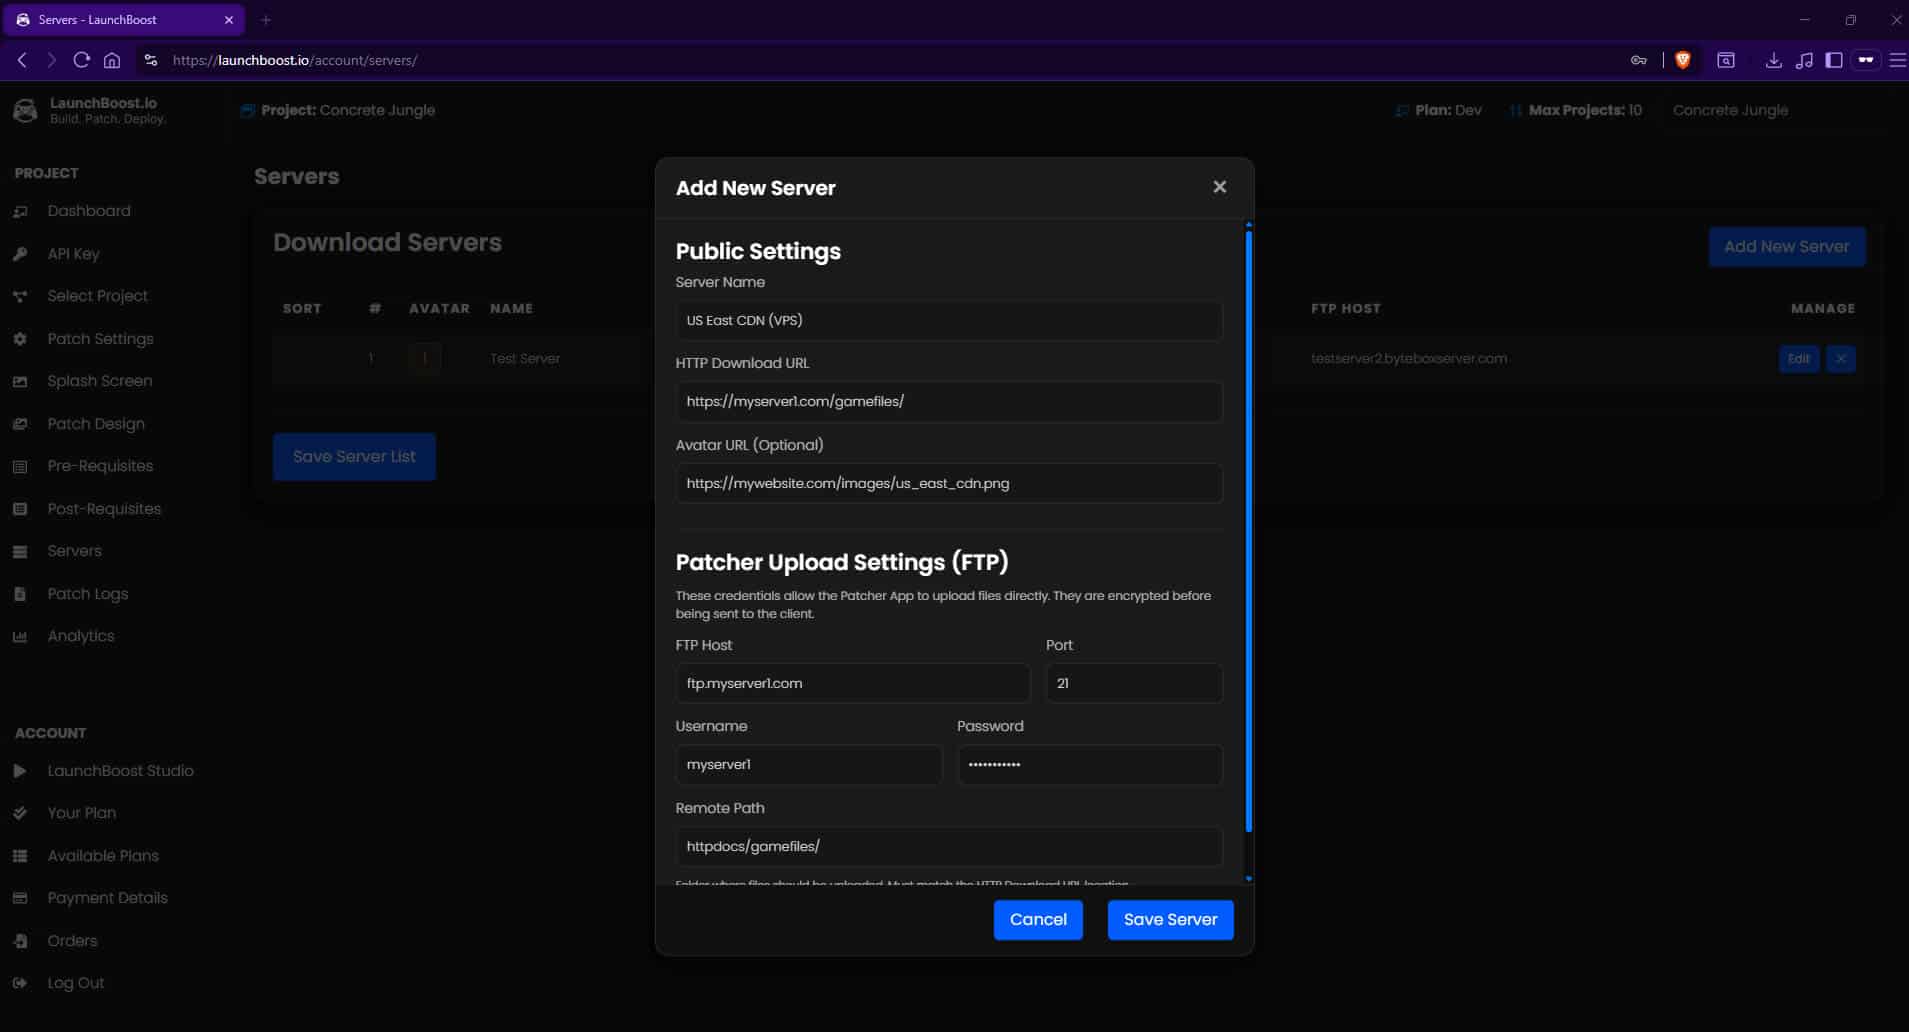
We highly recommend serious game developers or those with big playerbases have at least two patch servers. This allows for load-balancing and redundancy failure should one server go offline or become overloaded.

You can use web hosting, VPS, dedicated server or an Amazon S3 bucket but if you are looking for a specialist patch server, we offer some highly optimized patch servers here.

When you are ready to get started, just click the button.

Tutorial Guide

  • 1Introduction
  • 2Create Server List
  • 3Activate Dialog
  • 4Forcing a Primary Server

Introduction

With LaunchBoost.io and the Developer Edition, you can specify multiple servers to use for your game patching.

Multiple servers are handy for having mirror locations. Maybe you want the player to choose the closest server to them? Maybe you want a network of servers so that you have redundancy should one fail.

Either way, we recommend serious game developers have at least two servers for game patching. The patch system is intelligent enough to try Server A and if that fails for a particular download, it will try Server B.

If you don’t have redundancy and your single patch server goes offline or goes down, your players will end up stuck and not able to patch fully until restored.

Having two servers also distributes the load. If you have a big playerbase and 500 users connect to Server A at the same time, the server may not allow any further connections until one is released, so having a second server allows the patch system to revert to that one instead.

In this tutorial, we will show you how to setup and configure multiple servers and even show you how you can stipulate what primary server to use with a command line argument.

Step Visual

Create Server List

Head over to the Servers page in your dashboard.

Click Add New Server button and begin to add your servers. If you need help with this, look at this support doc here.

You can re-order the list of servers in this section too. Best to put your strongest and most used server first as the primary.

Once you have added at least two active servers, click the Save Server List button to save the array to your account.

Step Visual

Activate Dialog

Once you have setup your servers, if you want your users to be able to select a server when the patching starts, you need to head over to your Patch Settings page in the dashboard and check Allow Player to Choose Server in the Client.

This will present them with a dialog before the patching starts, allowing them to choose a server.

Forcing a Primary Server

Whether you have Allow player to choose server in the client checked or not, you can enforce a specific server to be the primary and not display the dialog when patching starts by simply sending the -server=# here.

This enables you to either strictly enforce that a particular server is used as the primary (first server for patching). This is also useful if you want to allow the user to select the primary server inside your game or custom game launcher. You simply pass the command line argument -server=# when launching the patch system.

To find the “number” for the command line argument, on the Servers page where your list of servers is, look for the number in the # column. That is the server index.